Jiggly Jellyfish Candy Holder

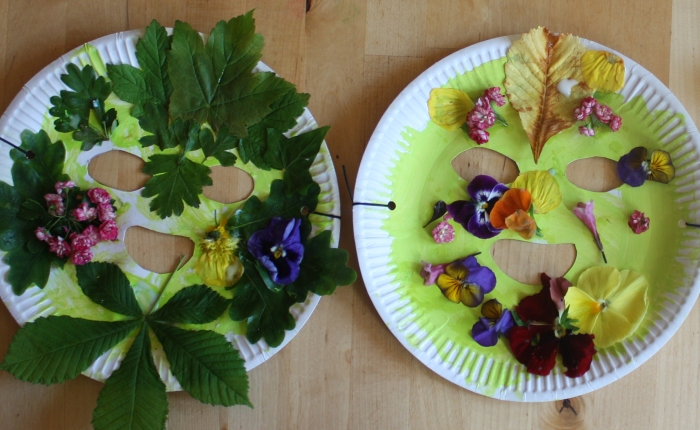
This week was Amelia’s school summer fair. The children came home with a paper plate to decorate with a “beach” theme and fill with candy to donate as a tombola prize.

IMG_0259

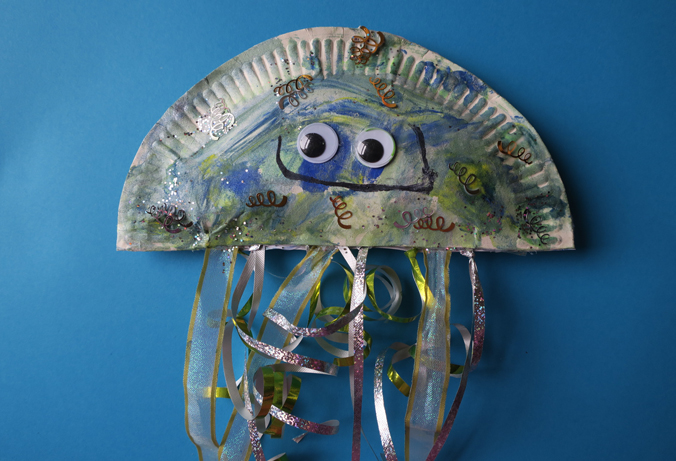
Amelia painted her plate blue, yellow and silver; then we folded it in half, filled it with candies and sealed them inside by gluing the edges together with a hot glue gun (sorry, no photos of this stage as I was too busy making sure she didn’t eat them all and we actually had something left to give to the school). Amelia added some googly eyes and drew a lovely smiling mouth. She then glued on some confetti and glitter to make it shimmer.

To make the tentacles I punched holes in a narrow strip of card and Amelia threaded a length of gift ribbon through each one. We glued this strip to the back of the jellyfish and covered it up with another painted half plate (not necessary, just made it look a little neater by covering the ribbon joins).

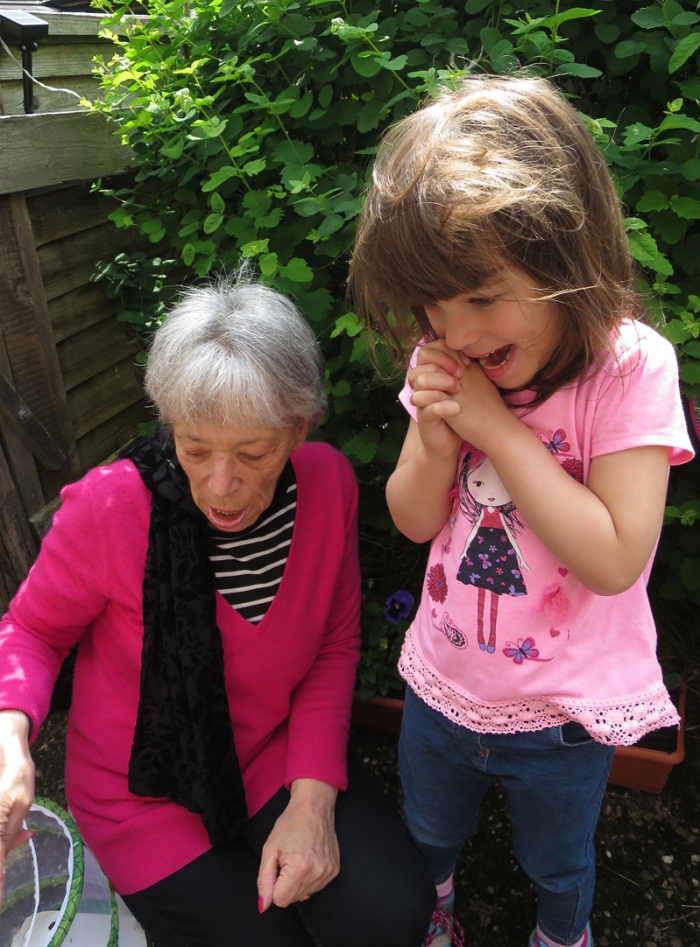
Amelia loved making her jiggly jellyfish – and I’m sure whoever wins it will love their surprise too!

Handprint Monkeys

monkeys

Here’s the birthday card my 2 little monkeys made for their Daddy. We did the hand prints first with brown paint, then painted the greenery around them. The heads are gummed paper and googly eyes with the details drawn on with a Sharpie marker.

Of course, being the little monkeys that they are, the children then decided to paint each other… but that just added to the fun!

monkeys3.jpg

Rainbow Macaw Suncatcher

Rainbow Macaw Suncatcher

My 17 month old loves parrots. It started when her grandad bought her a brightly coloured parrot finger puppet, which quickly became a favourite toy. Now every time she sees a parrot picture she points, smiles and does this cute little thing with her finger like she’s making a pecking beak. My 4 year old just likes anything rainbow coloured, so I was pretty sure these rainbow macaw suncatchers would be a hit with both of them!

parrot2

Materials:

  • Black card
  • Coloured cellophane
  • Craft knife
  • Scissors
  • Glue stick
  • Laminator & pouches (optional)

parrot making

First make your macaw template by drawing it carefully on black card (or find an image on the internet, print it out and stick this to the card). Cut around all the inside sections with a craft knife, so you have something like the first image.

Next use the glue stick to glue all around the black outlines on one side of the template. Cut strips of cellophane and lay them across the cutout areas to give your parrot its colouring. (I just used one colour for each section but Amelia found this a bit tricky and layered random shapes across one another, which gave a really good effect when they mixed).

parrotc_edited-1
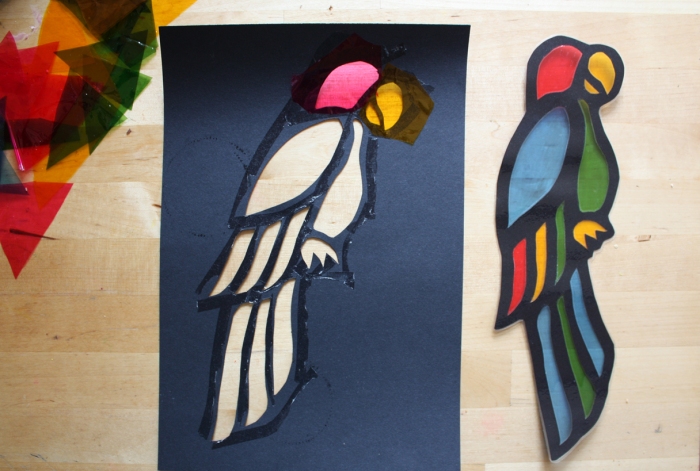
Finally, cut around the parrot shape and remove the excess black card (you can do this before you start adding cellophane, but we found it easier and neater to leave this step til the end).

To finish it all off I then laminated our suncatchers to give them a glossy finish and prevent pieces of cellophane falling off, but this isn’t necessary. I also added an eye with a Sharpie marker (original plan was to use a hole punch to make a dot from black card and add this before laminating, but I forgot and the Sharpie worked just as well!)

Here’s the finished suncatchers on our window. They looked like little lovebirds, so we made a cellophane heart to go with them too. 🙂

parrot1

Paper Plate Nature Masks

Paper Plate Nature Masks

The weather has been glorious here this week so we’ve been out enjoying the sunshine and haven’t had much time for crafting. However, we did find one fun craft activity  that was great to do outdoors…

To make the masks, I cut eye and mouth holes in some paper plates. We painted them green and hung them on the line in the sunshine to dry.

maskmaking2

While they were drying, we went on a nature walk in the local park to collect our leaves and flowers. When we got home we laid them out on the garden table and started sticking.

4 year old Amelia decided to decorate her plate mask with only flowers and colourful leaves. Then she helped 16 month old Ciara with hers, saying she was giving the mask “pretty rosy cheeks” to match Ciara’s own ones! 🙂

masksmake

Once the girls were done sticking, we again left them out in the sunshine to dry. After that I punched holes in the sides of each plate and threaded through some elastic so they could be worn as masks.

Then all that remained to be done was to try them on…

masks2

Spring Flower Sugar Cookies

Spring Flower Sugar Cookies

cookies1

Another of our favourite and most versatile recipes. (The quantities are a bit weird as it’s one of the few baking recipes I do in metric as the Imperial conversions don’t work out exactly, but it’s a pretty forgiving one if you don’t get the quantities quite right anyway.)

Ingredients:

  • 9oz (250g) butter, softened
  • 5½oz (150g) sugar
  • 1 egg yolk
  • 11oz (325g) plain flour
  • 2 tsp vanilla extract
  • Icing sugar
  • Milk (for the icing)
  • Food colouring
  • Sugar sprinkles

Method:

Preheat oven to 350°/180°/Gas mark 4.

cookies3

In a large bowl, cream together the butter and sugar. Stir in the egg yolk and vanilla extract. Gradually mix in the flour until you get a good workable dough. Wrap in saran wrap (cling film) and refrigerate for an hour.

Roll the dough to about 5mm thickness and cut out shapes with cookie cutters. (It doesn’t have to be neat – the photo shows what ours were like after the kiddos had “shaped” them, and they still turned out great!) Place on a baking sheet and bake for 10-15 minutes, until slightly browned around the edges.

Leave to cool completely then ice as desired. (To make the icing I just measured out a bowlful of icing sugar, then gradually added milk until it would only just pour from a spoon). We made cheerful spring flowers with bright icing, sugar sprinkles and chocolate pieces!

IMG_3009

Raising Caterpillars – Update 7, Releasing the Butterflies

butter1

Well, today was the big day! It was warm and even sunny in patches, so we knew we really needed to release our butterflies in case the weather didn’t hold out for the weekend (I live in the north of England, and getting 2 days of sunshine in a row is regarded as something in the order of a minor miracle).

At first we took the butterflies outside in their enclosure, so they could acclimatise to the weather. Soon they were fluttering and flying, so we opened the lid. Two of the butterflies wanted nothing more to do with us and flew straight off over the houses, but the other three were more hesitant to go.

Amelia was wearing a butterfly patterned top and our butterflies must have thought some friends had come to greet them as, to her delight, two of them fluttered straight onto it!

Another butterfly fluttered away fairly quickly, and we placed the remaining two onto a leafy bush to finish warming their wings in the sunshine.

It’s been such an amazing experience for all of us. I thought Amelia would have been sadder about letting the butterflies go, but in the end she was just excited about them landing on her top, so we were pretty lucky there.

butter0butter4


Homemade Soap Ducks

ducksI got some lovely new duck shaped double aperture soap moulds from Hobbycraft and decided to give them a trial run. (Please see my first post Butterfly Glitter Soaps for the melt & pour soapmaking process).

I also got some new yellow dye from eBay seller World of Moulds as the yellow I had got with my Hobbycraft starter kit was useless (I had to use the whole bottle to even get a cream colour!) This stuff was much better.

To make these, I first melted a tiny piece of white soap base, coloured it orange, then used a teaspoon to drip it into the beak area. I quickly added some blue to the remainder and used a cocktail stick to drip an even tinier amount in to make the eyes. Once this was dried I melted some more white soap base, added canary yellow dye and banana fragrance and poured it into one mould to make the opaque duck.

For the other duck, I cut cubes of white soap base, then melted some transparent base, added yellow dye and pineapple fragrance to it and dropped the white cubes into the mould along with the molten transparent yellow soap. (I found it was best to let this cool sightly – though not to the point of forming a skin on the top – before pouring, so it didn’t start to melt the white cubes encased within it.)

And there you have it, two fun and fruity ducky soaps to make bathtime an extra special treat!


Cooking with Kids – Choccy Coconut Balls

Cooking with Kids – Choccy Coconut Balls

This recipe is so simple and so tasty you wan’t believe it uses just 4 ingredients! (In fact, you can even make it with 3 if you want to leave out the coconut). The basic recipe is very similar to Easy Chocolate Tiffin but even more kid-friendly as it requires no heat sources whatsoever. In fact, my 4 year old and 1 year old more or less managed to make the whole thing by themselves (with just a careful and well timed catch required from me when my over-enthusiastic 16 month old managed to launch the whole mixing bowl off the table while crunching up the biscuits!)

cook

Ingredients:

  • 8oz (225g) digestive biscuits, whole wheat biscuits or Graham crackers
  • 4oz (115g) desiccated coconut
  • 14oz (397g can) sweetened condensed milk
  • 3tbsp cocoa powder
  • Assorted cake sprinkles/extra coconut
  • Mini cupcake cases (optional)

cook 1

Method:

Crush the biscuits completely. You can do this in a food processor, but a more fun way is to put them in a clear plastic bag and let the kids crush them with a heavy rolling pin (I can still remember doing this as a child myself, all those thirty-something years ago! :-))

cook3 (2)
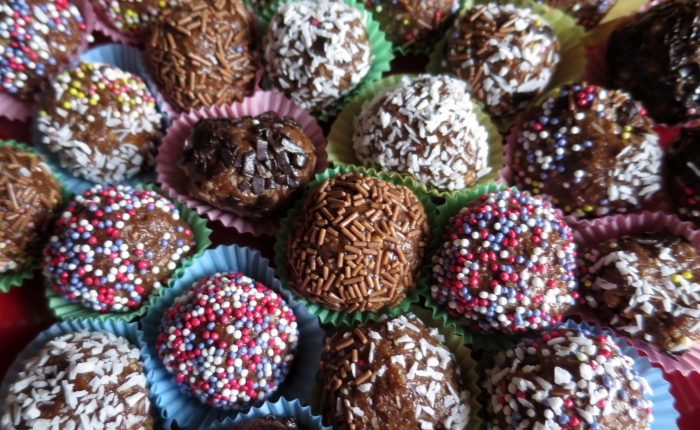
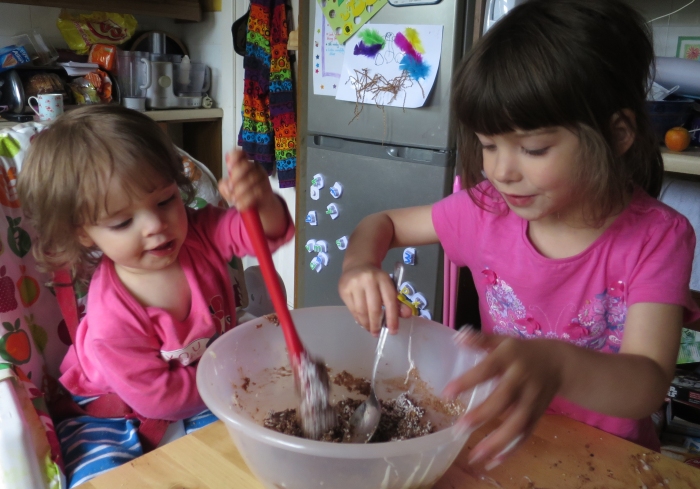
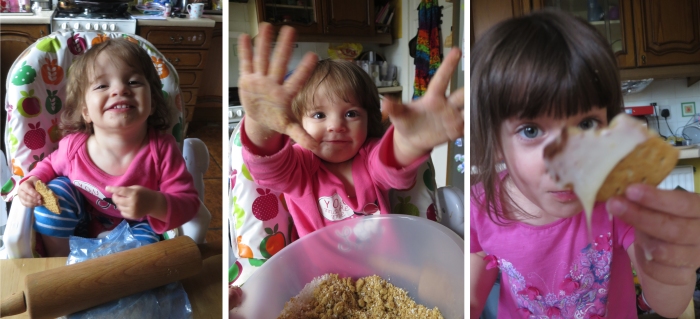
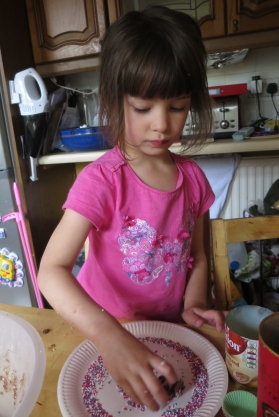
Empty the crushed biscuits into a large mixing bowl, add the cocoa powder and the coconut and stir to combine.

Pour in the sweetened condensed milk, and mix well until you get a good workable consistency. (You may not need the whole tin – we didn’t, but that may have had something to do with the copious number of biscuits that went missing in the making).

Take small (dessert-spoonful) scoops of the mixture, roll into balls and cover with sprinkles or extra coconut. (I laid out various topping on paper plates, and the children rolled the balls in these to coat as desired.)

Put each ball into a mini-cupcake case, if you have them, or else directly onto a plate and chill in the fridge for an hour.

Enjoy! 


Raising Caterpillars – Update 6, Day 31

look2_edited-1.jpg

Four of our five caterpillars have now turned into butterflies! We’re planning on giving them another couple of days to see if the last one emerges and then releasing them into the wild.

Apparently Painted Lady butterflies will naturally “migrate” from where they are released to their native habitats (at least that’s what the Insect Lore info sheet says). I don’t know whether this is actually true, or just one of those things they tell to kids to make them feel better, whereas in reality the poor things will spend the rest of their short lives weaving aimlessly through traffic in the centre of urban Manchester – but, hey, they said the chrysalids on the ground would be OK and so far they have been right, so maybe it’s time to suspend my natural skepticism and accept they know what they are talking about!

chrysalis
Ready to emerge

Watching the transformation so close up has been truly amazing. I took this photo of one of our chrysalids just minutes before the butterfly emerged – and you can actually see the butterfly’s wing inside!

Our butterflies seem to be enjoying their plates of fruit salad, although I’m sure they will ultimately be happier to be released into the wild (presuming what I said above is true, anyway!)

It’s been a privilege to share our house with such a wonder of nature, and over the next couple of days we will be sure to take in every detail before saying goodbye to our fluttering friends.