Way back in April last year I made this post on the Clay Owls that I made with my then 4-year-old daughter. We finally got round to finishing them, and our neighbour fired them in her pottery kiln.
I don’t have a picture of my daughter’s owl, as she decided to give it to our neighbour as a present. but here is how mine turned out (and I’m rather pleased with it!)
If you ever get hold of some clay and don’t know what to do with it I really would recommend giving these a try, as they’re so easy and fun to make!
As I’ve mentioned before, we’re lucky enough to have a lovely neighbour with a pottery kiln. This time she invited us over to make some clay tiles, so I thought I’d have a go at making designs using the children’s hand and footprints.
I used a handprint for 5 year old Amelia, and footprints for 2 year old Ciara, which meant both fitted nicely onto the space available. Amelia enjoyed painting her own hand and making the print, and then I added on extra detail to turn it into an owl (yes, I know I always make owls – I think they’re beautiful creatures, and one of the only things I can actually draw or sculpt successfully too!)
Next I’m planning on getting some thick cord to go through the holes at the top so we’ll be able to hang the tiles from the wall.
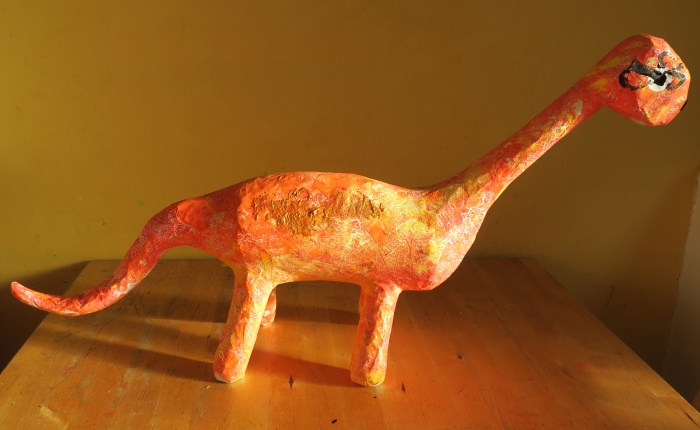
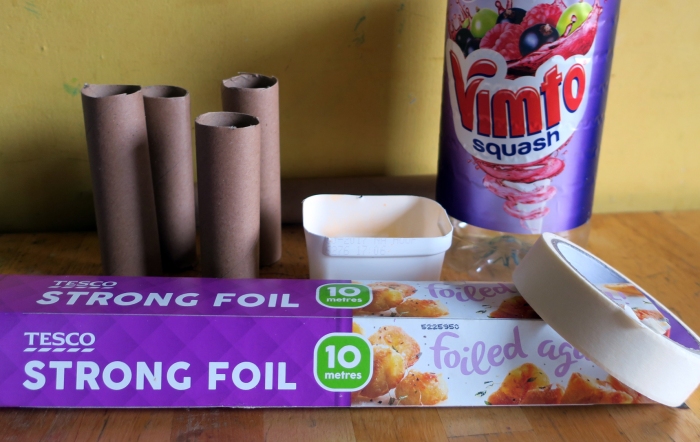
My 5-year-old’s school homework this week was to make a model dinosaur. We started with the simple materials below (2l drinks bottle, wrapping paper tube, yogurt pot, silver foil and masking tape).
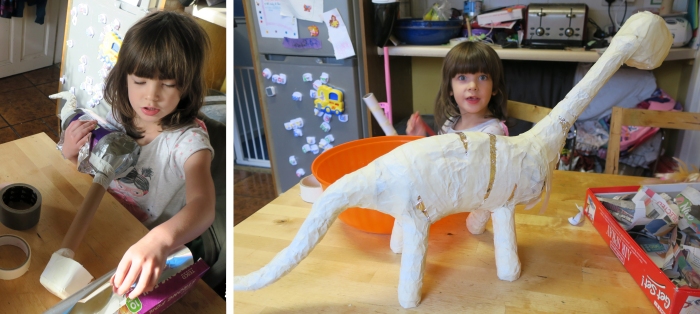
We cut 4 short lengths from the wrapping paper tube to use as legs, then used masking tape to attach the remaining long section to the drink bottle at an angle to make a long neck. We attached the yogurt pot to the top of the tube to form a head, then shaped a tail out of silver foil.
We used more silver foil to shape the dinosaur’s back and chest, then covered the whole thing in masking tape.
The masking tape was followed by 2 layers of paper mache (newspaper strips soaked in PVA glue diluted 50:50 with water) and finished with a layer of plain white paper.
Amelia painted the dinosaur, choosing orange and gold for the body, then sticking on white paper circles for eyes and adding detail with black paint.
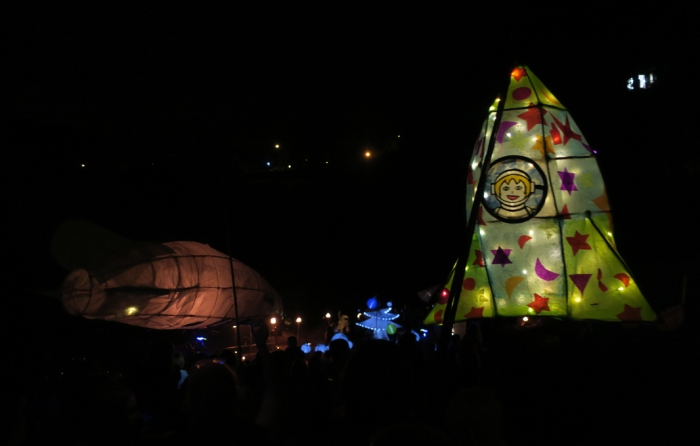
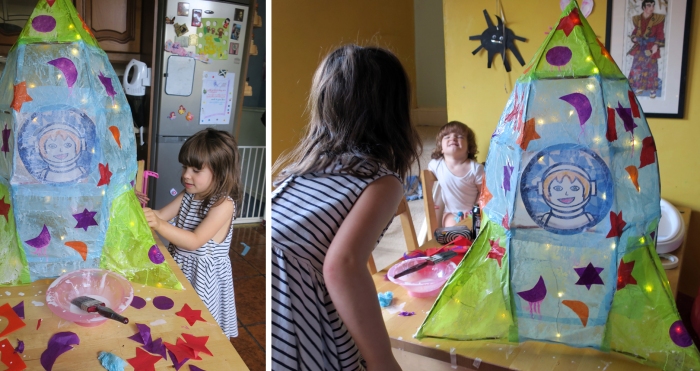
Well, we finished making our lantern and all that was left now was to join the parade!
We went to the New Mills Lantern parade last year, but this was the first time we had made our own lantern. It was a lovely evening, surprisingly warm for a British September, and Amelia loved getting all the compliments on our colourful lantern. Will definitely be going again next year!
With our lantern frame looking good we moved on to the next step. I bought a string of battery powered fairy lights and wound them around the frame on the inside of the lantern, securing them at various points with masking tape.
Next we made an astronaut cutout using the technique from Rainbow Macaw Suncatcher (it was tricky to cut such a fine outline, but worth it in the end). We then glued the decorated cutout to the outside of our willow frame and covered it with a piece of white tissue so the image would shine through. If I were doing this again, I think I would glue the decorated cutout to the outside of the lantern after it had been covered in tissue instead, so that the picture appeared more vivid – but either way will work.
Before covering the lantern, I twisted some think wire around the top and made a loop so that the lantern could be hung from a hook and carried by it.
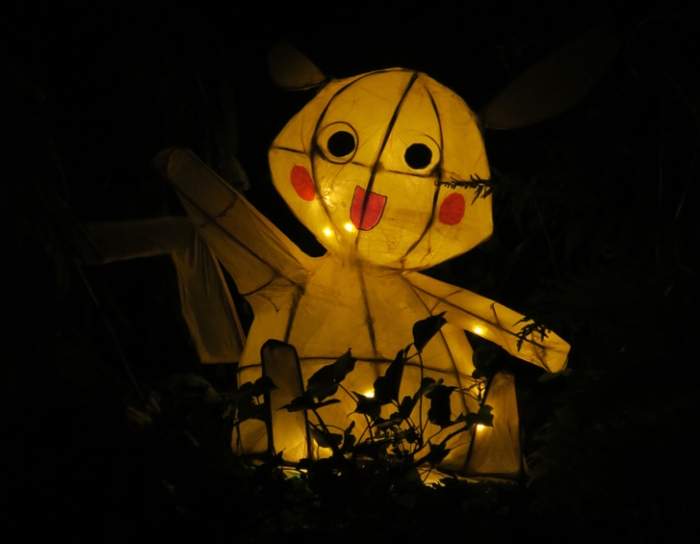
Everything was going so well, I didn’t anticipate any problems covering the lantern, and even thought my children would be able to help. I mixed equal parts of water and waterproof PVA glue, then cut some large sections of blue and green wet strength tissue paper. It may well have been “wet strength”, but it certainly wasn’t “preschool child and toddler strangth.” About 20 holes, twisted paper pieces and 2 glue-haired children later, I hurried the kids into the lounge and attempted to repair the situation myself with the last remaining pieces of tissue. I wish I had taken some pictures of our first attempt, but I was too busy with damage mitigation (and covered in glue myself) that I couldn’t risk taking out my camera! Anyway, the lantern is pictured after I had patched it up as best I could. I’m not entirely happy with it, but think it will look alright when it is lit and in the parade.
I cut out various shapes from coloured tissue paper and Amelia glued them on as well as cutting some of her own. We used regular tissue for some of the colours which was a bit of a mistake as the colours were not waterproof and bled when they made contact with the glue – but again I think it will look fine when it is illuminated at night time.
We hung the lantern up to dry, and as it dried the tissue began to shrink, which made it look a little neater and also feel stronger. Once it was completely dry, I cut a small hole in the bottom so that the switch for the fairy lights could be accessed, then covered this with a small rectangle of tissue paper (doubled over for strength and glued on one edge to form a hinge).
Now we’re looking forward to the parade – and hoping it will be a warm, dry day!
Last year was our first time at the New Mills Lantern Parade. We were all mesmerized by the beautiful lights, and decided that this year we would have a go at making our own lantern to take along.
New Mills Lantern Festival 2015
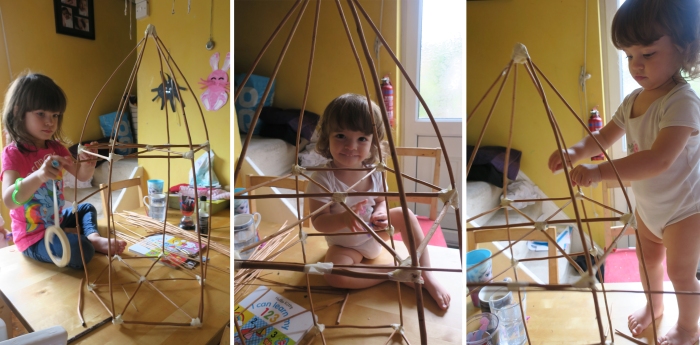
This year the theme of the parade is “inventions”. We decided on a space rocket lantern (mainly because it involves less tricky curved pieces than a lightbulb or a wheel!)
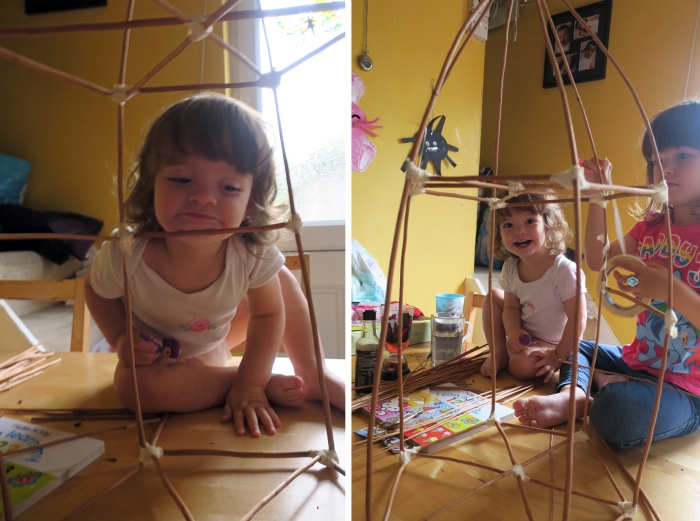
Making the frame was surprisingly simple. Amelia helped to stick the willow withies together with masking tape, while 18-month-old Ciara had a good explore of our materials.
And before we knew it, we had a (vaguely) rocket shaped structure.
Here’s a lovely fun musical instrument that is so easy to make.
You will need:
3 paper plates
Clear plastic (from any strong plastic packaging)
Strong glue, staples or tape
PVA glue
Paints and brushes
Beads
Method:
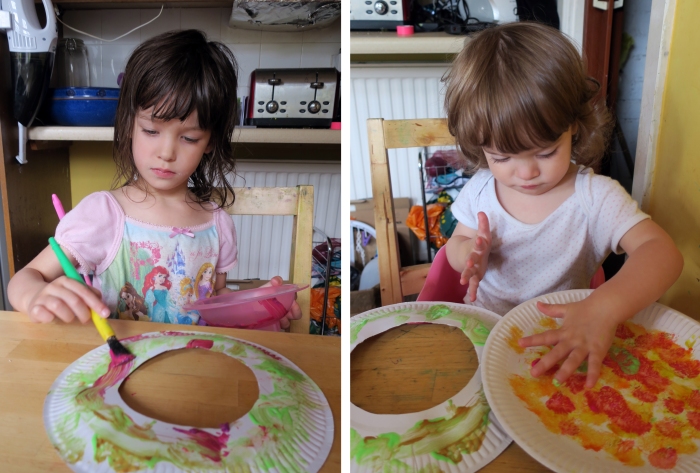
Cut circles from the centres of 2 of the paper plates. Cut a circle of strong clear plastic (I used the lid of an old chocolate box) making it slightly larger than the circles you have cut out and affix it securely to the raised side of one plate.
Now give your children the other paper plate to paint (on the raised side) along with the uncut plate (paint on the inside).
When the paint has dried, glue the painted plate with the hole in it over the one with the plastic on it to secure even further and cover up the taped joins. This will be the front of your drum.
Decorate the uncut plate further if you like (we added a turtle sticker, to stick with the ocean theme) then add a good handful of beads.
Staple or hot glue the plates together with the beads inside, then reinforce around the edges with duct tape. And there you have it – your very own ocean drum!
A few months ago we planted some fruit and veg in the garden. We’d tried this in previous years, only to find everything devoured by slugs in a single night. (Well, everything except the radishes – it seems that slugs don’t like radishes.)
Radishes are always a success
Anyway, this year we thought we’d outsmart them and grow everything in containers.
We didn’t just plant our crops in containers, we fortified them with copper tape, coffee grinds, broken shells and milk-bottle cloches… all the things that are supposed to keep slugs away.
Well, it’s amazing how high slugs and snails can climb, and how persistent they actually are.
We lost the whole crop of lettuce, the thyme and the coriander. However, we did have some success with the carrots and the one pot of strawberries that we’d placed several foot above the ground (the ones at ground level stood no chance!) Most of the herbs also did well – especially the mint, rosemary and lemon balm.
Tiny carrots
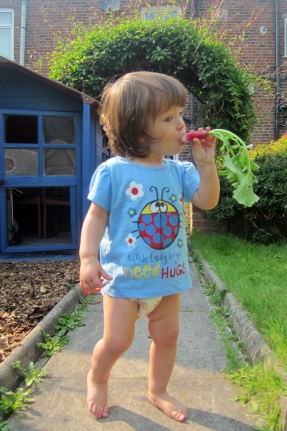
But out of everything we grew, we all agreed one thing was by far the best – our heart shaped strawberry!
If anyone has any suggestions of edible crops that slugs and snails just won’t touch please do leave us a comment, as we’re hoping for even more success next year! 🙂
This is one of our favourite cupcake recipes – it’s so simple, and can be used in so many variations. I’ve found the key with it is to whisk, whisk and whisk again! This recipe makes 24 small/medium cupcakes, or 12 larger ones.
Ingredients:
175g (6oz) butter + 75g (2.5oz) for the icing
175g (6oz) caster sugar
2 teaspoons vanilla extract
3 medium eggs
175g (6oz) self raising flour
350g (12oz) icing sugar
2 tbsp milk
jam/jelly (we used seedless raspberry)
candy sprinkles & decorations
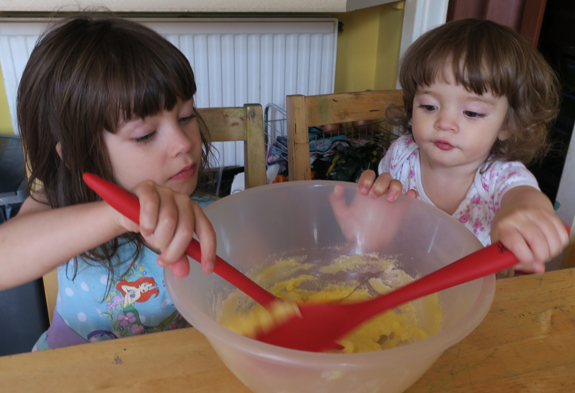
First time with the electric whisk
Preheat oven to 170°/350°/Gas mark 3
Soften the butter in a microwave (you don’t want to melt it completely, just make it easier to mix, so use a low power setting for 10 seconds at a time). Put the softened butter into a large mixing bowl with the sugar and whisk until light and fluffy.
Add the vanilla extract and eggs and whisk again.
Now add the flour and whisk until smooth. Keep going for several minutes to make a really light, fluffy mix.
Pour into cupcake cases and bake for 14-18 minutes. The cakes are done when the top bounces back when touched, and a skewer comes out clean. (If they don’t bounce back, return them to the oven as quickly as possible to avoid them going flat!)
Allow to cool on a wire rack.
Once cool, cut out the middles (I found a traditional potato peeler was great for this), fill with jam (jelly) then put the middle back on as a “lid”.
Soften your remaining butter and mix with the icing sugar, 2tsp of vanilla extract and 2 tbsp of milk until you get a smooth icing.
Ice your cupcakes, and add whatever tasty decorations take your fancy. (We used rainbow strips and sugar sprinkles, along with some My Little Pony figures we’d got from Kinder eggs.)Enjoy!
Today’s post is a little different, as I’ve just received a Liebster award from the lovely Amanda Wolfe at funfiercemama.com. Many thanks to you, Amanda, for the nomination!
At first I had no idea what this meant, but I as I read the post it looked like a lot of fun as well as a way to make new blogging friends, so here goes…
First, this award comes with a few rules:
Thank the blogger(s) who nominated you
Answer the 11 questions the blogger gives you
Nominate 5-11 bloggers that you think are deserving of the award
Let the bloggers know you nominated them
Give 11 facts about yourself
Give them 11 questions of your own
Questions from Fun Fierce Mama:
What’s your favorite part of blogging? Looking back on my published content, and the comments you lovely readers leave for me.
What is your favorite topic to read about on blogs? I love reading about arts and crafts and getting inspired by new ideas.
Favorite Vacation destination? Rarotonga, in the Pacific Islands. I went with my husband when we had just got married, and we went swimming in coral reefs, watched Island dancing, sipped cocktails on sunny beaches – it truly was Paradise!
Swimming underwater in Rarotonga
If you could be anywhere right now where would you be? As above, but this time my kids would be there too. They’ve never been outside the UK as we just can’t afford it, but I always dream of taking them somewhere amazing.
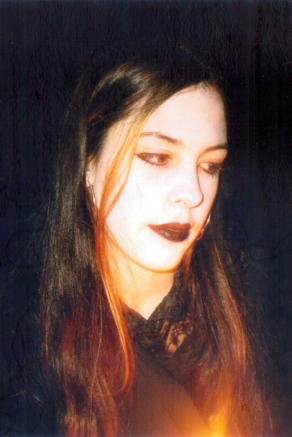
What is something quirky about yourself? I was a Goth in my teenage years.
Gothic Me, back in 1996
How many blogging awards have you received? This is my first one!
What is your 5 year plan? I’ve never really had 5 year plans before, because I never really found something I cared enough for (career-wise) to imagine it carrying on. But now I have 2 lovely daughters I have really found my calling in life, and think I would be happy just moving to somewhere with a little more space for them to run around (my 4 year old wants a treehouse!), find a job where I use some of my real interests (craft, kids, writing etc.) and still be there for my family, as well as trying a couple of new crafts myself (quilting, resin casting and metal clay all look very appealing).
Favorite food? Sushi. Especially the salmon ones. I went to Japan years ago and the food was simply amazing – delicious, and so well presented too. I would never tire of eating it.
What was your 1st job? Working as a shop assistant in Boots (UK chemists).
My father, in the Royal Horse Artillery
Who inspires you? My dad. I love how he lives life to the fullest and is always up for new adventures. He was a Hippy in the 1960s, a soldier in the Royal Horse Artillery, a businessman and IT trainer, a farmer in New Zealand, sailed a Dutch barge around Europe, now writes mods for computer games… and still always has time for me, and is the person I most love talking to!
Something most people don’t know about you? I used to play the clarinet in the school orchestra (but like most other things I learned at school, I’ve completely forgotten how to now!)
At work, I love organising the social events but hate having to go to them
I have a law degree from Oxford University (but have never landed a job where I’ve needed it)
After University I spent a year volunteering in Glasgow with the Jesuit Volunteers
I have a great uncle who was a racing driver (and won the Luxembourg Grand Prix)
Before I had the kids, I used to make and sell handmade (kiln fused) glass jewellery
I was named after the Ancient Roman “Julia the Elder”, whom my father was studying at university when he found out my mother was pregnant with me
When I got married I made the cake, invitations, bouquet and table decorations myself
My favourite dessert is pistachio ice cream
My favourite artist is John William Waterhouse
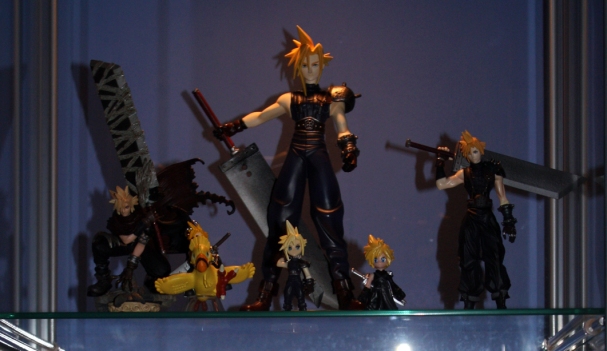
In my life before children I loved playing video games (now the toddler just chews on the controllers) and I still have a collection of Final Fantasy VII figurines…
Cloud collection!
My questions for the nominees are:
What inspired you to start blogging?
What makes you the happiest in life?
What’s the most useful thing you learned at school?
And the least useful?
If you could swap lives with anyone in the world for a day, who would it be and why?
What annoys you the most?
What is the one thing you can’t live without?
What do you feel the most proud of?
What’s the strangest thing you’ve ever eaten?
What’s your favourite place you’ve ever visited?
What’s your favourite quote or motto?
Well that was fun! I can’t wait to read my nominations’ answers!


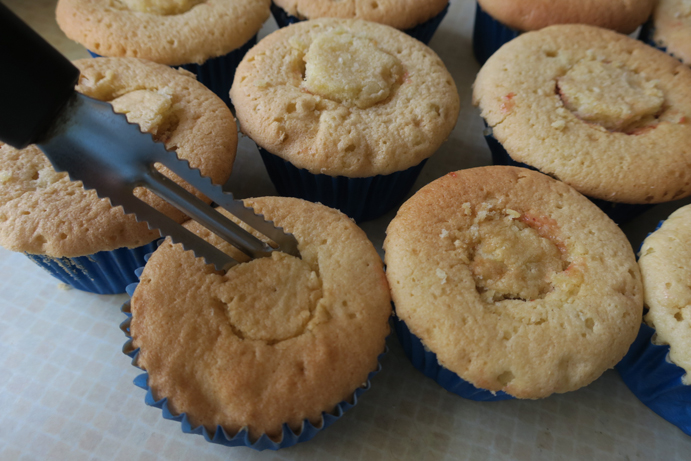 Once cool, cut out the middles (I found a traditional potato peeler was great for this), fill with jam (jelly) then put the middle back on as a “lid”.
 Ice your cupcakes, and add whatever tasty decorations take your fancy. (We used rainbow strips and sugar sprinkles, along with some My Little Pony figures we’d got from Kinder eggs.)
 Enjoy!